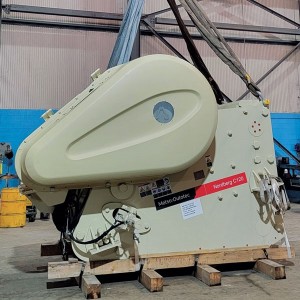
The jaw crusher is the primary crusher at most quarries.
Most operators don’t like to pause their equipment – jaw crushers included – to assess for problems. Operators, however, tend to ignore telltale signs and move on to their “next thing.” This is a big mistake.
To help operators get to know their jaw crushers inside and out, here’s a list of preventive steps that are imperative to follow in order to avoid dreaded downtime:
Eight calls to action
1. Perform a pre-shift inspection. This can be as simple as a walk around the equipment to examine components before the crusher is fired up.
Be sure to look at the dump bridge, checking for hazards to tires and inspecting for other issues. Also, look at the feed hopper to make sure material is in the feeder before the first truck dumps a load in.
The lube system should be checked, as well. If you have an auto greaser system, make sure the grease reservoir is full and ready to run. If you have an oil system, start it to ensure you have flow and pressure before firing up the crusher.
Additionally, the rock breaker oil level should be checked if you have one. Check the water flow of the dust suppression system, too.
2. Once the pre-shift inspection is complete, fire up the crusher. Start up the jaw and let it run for a bit. Ambient air temperatures and the age of the machine dictate how long the crusher may need to run before it’s put under a load.
During start-up, pay attention to the starting amp draw. This can be indicative of a possible bearing issue or maybe even a motor issue such as “dragging.”
3. At a set time – well into the shift – check amps while the jaw is running empty (aka, no “load amps,” as well as bearing temperatures). Once checked, document the results in a log. This will help you keep an eye on bearing life and potential issues.
It’s important to look for a day-to-day change. Documenting the temps and amps every day is crucial. You should look for a difference between the two sides.
A side-to-side difference can be your “red alarm.” If this happens, it should be investigated immediately

4. Measure and record your coast downtime at the end of the shift. This is accomplished by starting a stopwatch immediately as the jaw is shut down.
Measure the amount of time it takes for the jaw to come to rest with the counterweights at their lowest point. This should be recorded daily. This specific measurement is done to look for gains or losses during the coast downtime from day to day.
If your coast downtime is getting longer (i.e., 2:25 becomes 2:45 and then 3:00), this can mean the bearings are gaining clearance. This could also be an indicator of impending bearing failure.
If your coast downtime is getting shorter (i.e., 2:25 becomes 2:15 and then 1:45), this can be an indicator of bearing issues or, perhaps, even shaft alignment issues.
5. Once the jaw is locked out and tagged out, inspect the machine. This means going under the jaw and taking a closer look at it in detail.
Look at the wear materials, including the liners, to ensure the base is protected against premature wear. Check the toggle block, toggle seat and toggle plate for wear and signs of damage or cracking.
Be sure to also check tension rods and springs for signs of damage and wear, and look for signs of damage or wear to the base bolts. Wedge bolts, cheek plate bolts and anything that might stand out as different or questionable should be checked, too.
6. If areas of concern are found, address them ASAP – do not wait. What could be a simple fix today can end up as a major problem in just a few days.
7. Don’t neglect other parts of the primary. Check the feeder from the bottom side, looking at spring clusters for material buildup. It’s important, too, to wash this area out and keep spring areas clean.
Additionally, check the rock box-to-hopper area for signs of contact and movement. Check feeders for loose feeder bottom bolts or other signs of problems. Check hopper wings from the underside to look for signs of cracking or problems in the structure. And check the primary conveyor, examining pulleys, rollers, guards and anything else that could cause the machine to not be ready the next time it’s needed to operate.
8. Watch, feel and listen all day long. There are always signs of impending problems if you pay close attention and look hard enough.
True “operators” can feel, see and hear a problem way before it gets to the point of being a catastrophe. A simple “tinging” sound can actually be a loose cheek plate bolt to someone who’s paying close attention to their equipment.
It doesn’t take long to egg out a bolt hole and end up with a cheek plate that will never be tight again in that area. Always err on the side of caution – and if you ever think there may be an issue, stop your equipment and check.
Big-picture takeaway
The moral of the story is to set a routine that’s followed every day and know your equipment as thoroughly as you can.
Stop production to check for possible issues if you feel things are not right. Just a few minutes of inspection and troubleshooting can avoid hours, days or even weeks of downtime.
Post time: Oct-20-2023
